* Usage & Test Plan for the Zoom lesson is here.
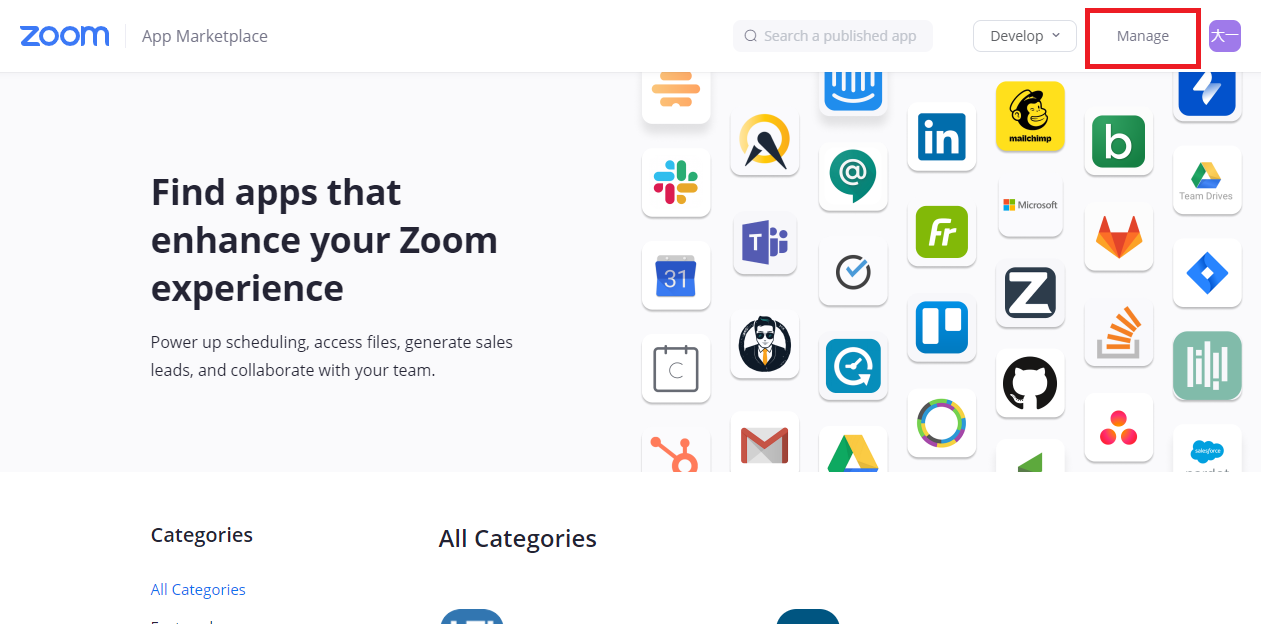
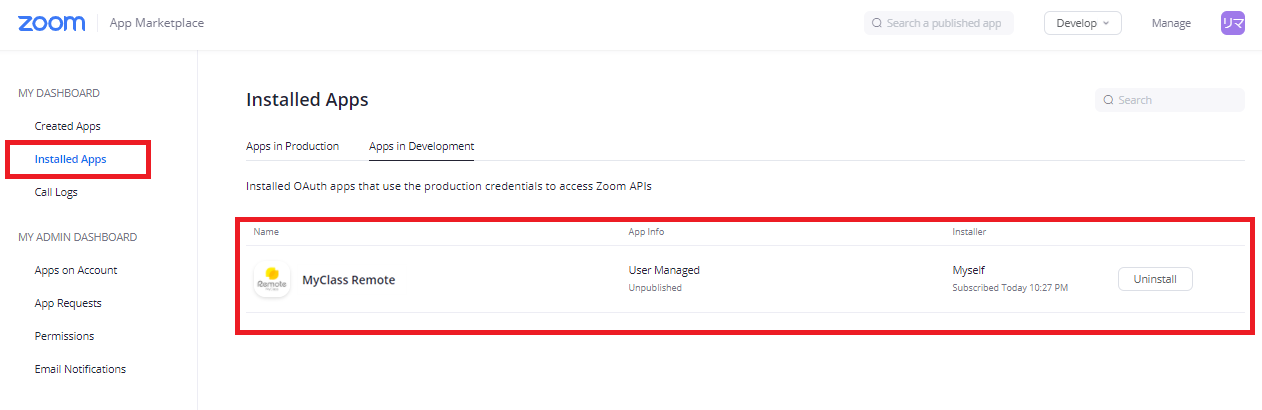
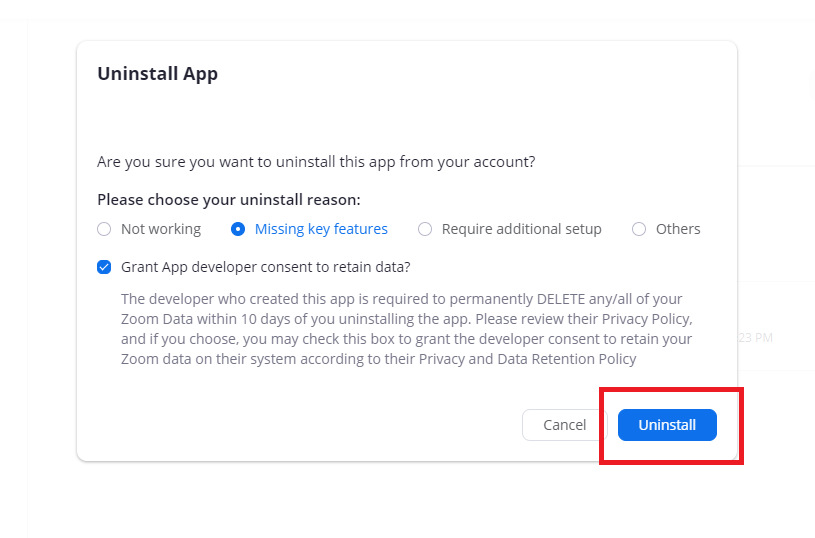
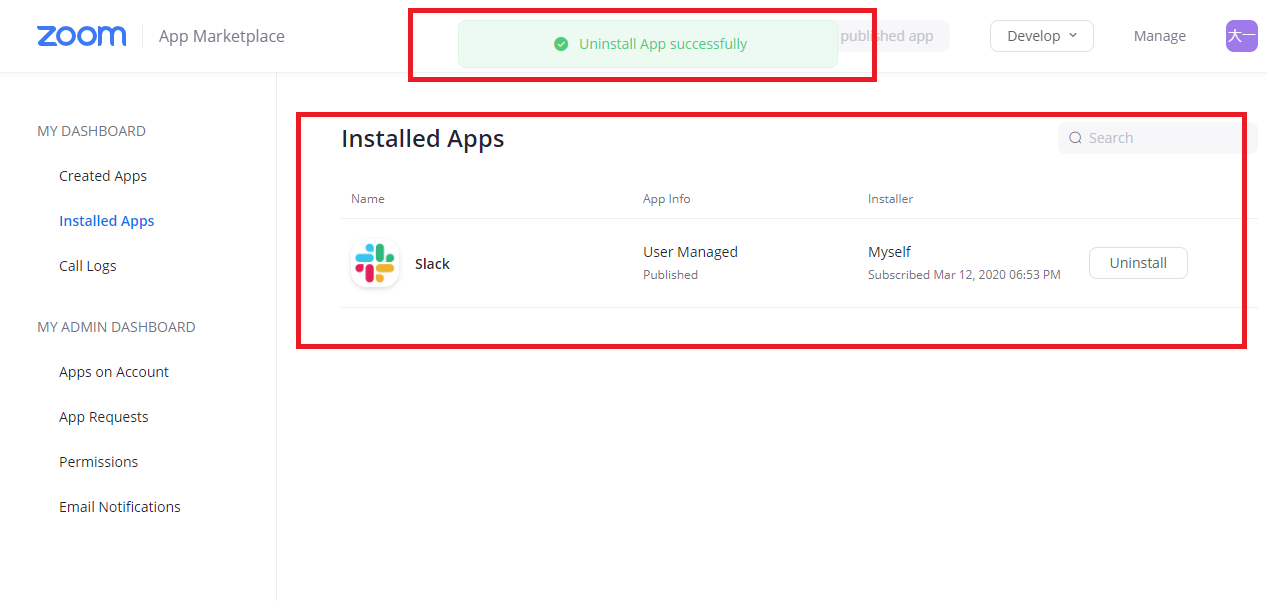
* Uninstalling the App is here.
 (講師詳細:instructor details) screen, display your details screen.
Confirm that the  (連携:add to Zoom) button is displayed in the "Zoom アカウント"(Zoom Account) field.
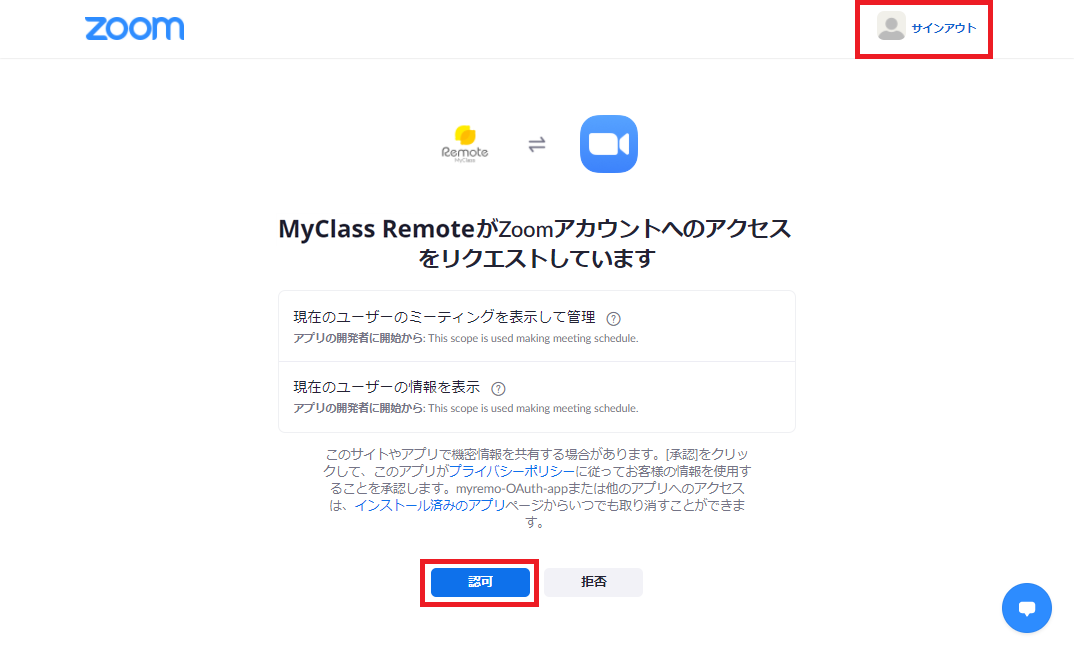
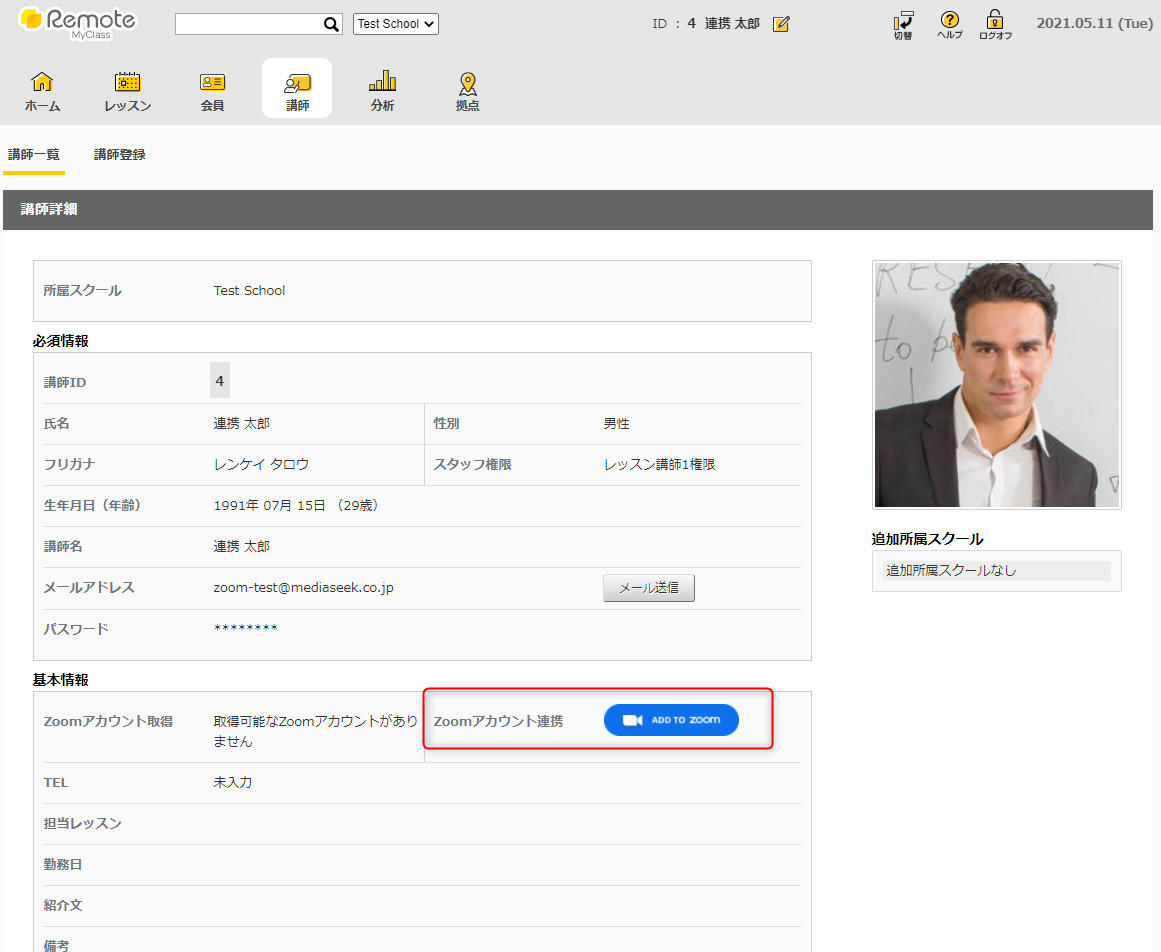 (連携:add to Zoom) button.
At this time, a pop-up confirming the integration will be displayed, but click OK to proceed to the Zoom screen.
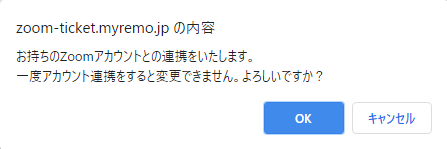
(お持ちのアカウントとの連携をいたします。一度アカウント連携をすると変更できません。よろしいですか。: We will link with your account. Once the account is linked, it cannot be changed. Is it OK?)
If you need to sign in, please do so.
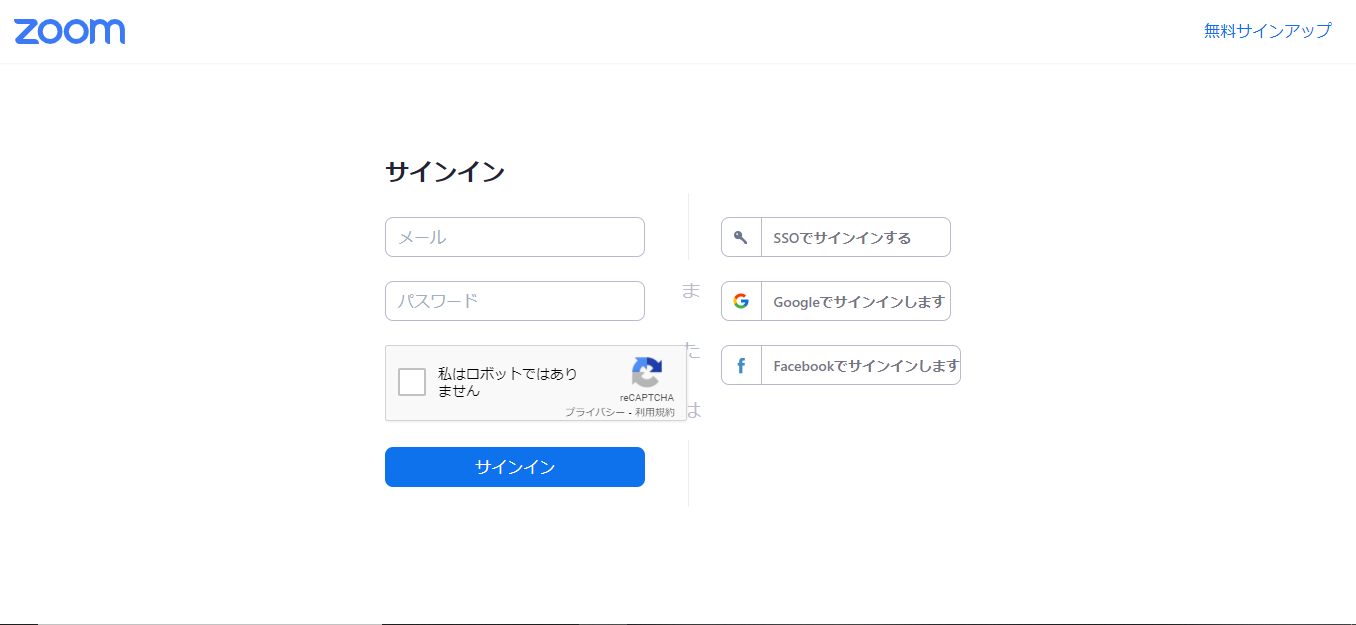
After signing in, you'll be prompted to approve the integration between your Zoom account and the app.
If there is no problem with the account you signed in, click the  (認可: Authorize) button.
* If you have already signed in to your Zoom account, the account you are signed in will be displayed in the upper right corner. Please be sure to check that the linked account is correct.
* Please note that if you select "拒否"(Reject) button at this time, the screen will automatically transition to the Zoom Marketplace screen.
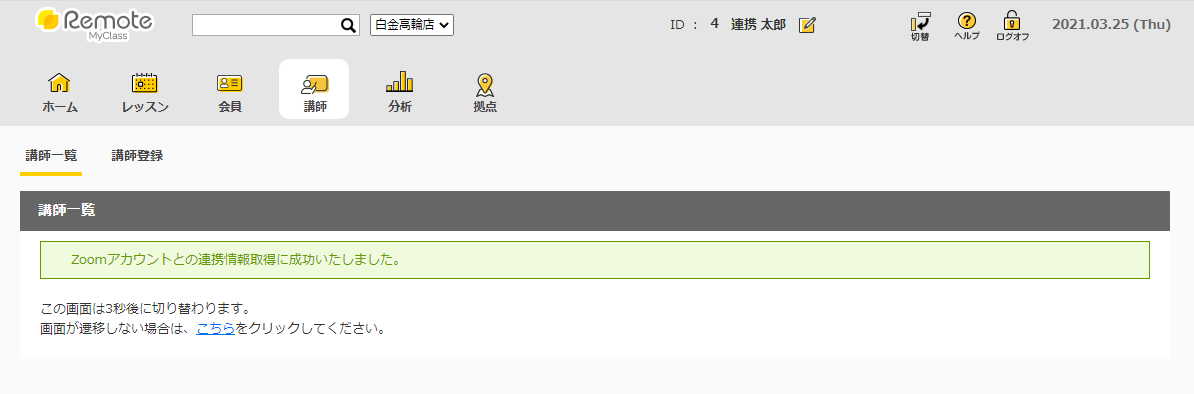
If it is in the following state, intergation with a zoom account is successful.

* Uninstalling the App is here.
MyClass Remote is a school management system.
The School information (member / instructor / course / lesson / notification email) can be set in advance, and when a member reserves a lesson, the reservation information, attendance status, payment history, etc. can be managed.
By linking with the Zoom app this time, when you create a lesson, you can automatically schedule a Zoom meeting for the lesson time without launching the Zoom app.
The registered lesson information will be published on the member reservation page, and members will be able to view and make reservations. When a member makes a reservation, a reservation completion notification email will be automatically sent to the instructor and the member himself or herself. This email contains lesson information, including the Zoom meeting URL. You can also check the reserved lesson information including the meeting URL on the reservation page.
In short, all the preparatory work up to the start of online lessons with the Zoom app can be put together on MyClass Remote, so school management work can be streamlined.
In this test, follow the steps below to check how online lessons can be held in "MyClass Remote".
*If you use the page translation function of your browser, the screen may not change correctly. Especially when pressing the button, it is recommended to operate on the original screen.
A: Zoom integration test
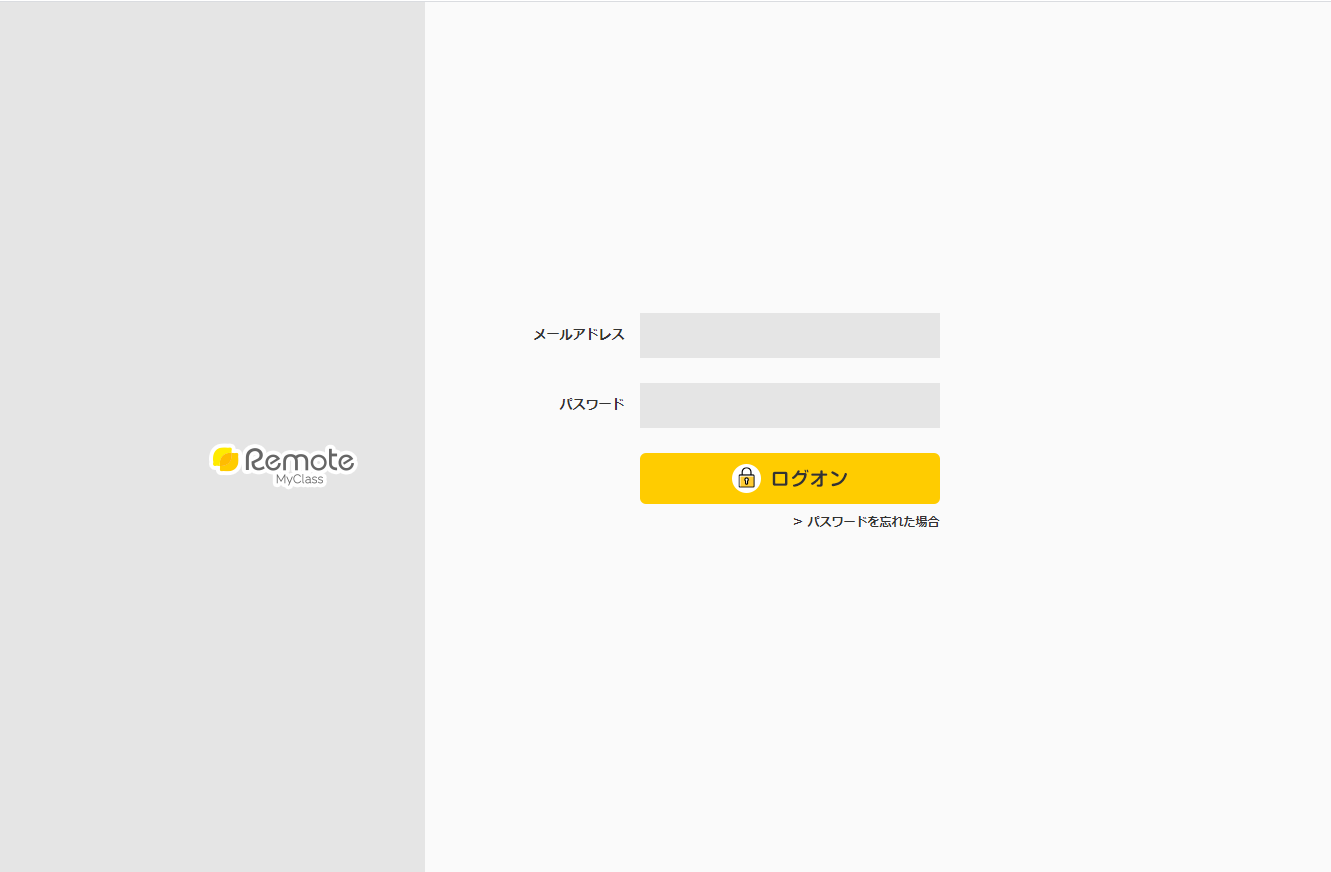
A-1: Sign in to MyClass Remote
A-2: Zoom integration
B: Online lesson test
B-1: Create online lesson
Screen transition
Select a lesson template
Check the “Zoom” box (password specified)
Select the date and time
Registration completed
B-2: Member reservation page sign in
B-3: Reserve an online lesson
B-4: Start online lesson
Instructor’s account: 
id: *****@*****
password: ********
Zoom account for integration (prepared by the reviewer)
Member’s account: 
id: *****@*****
password: *****
*You can see the demo operation video of loom.
https://www.loom.com/share/f92f6b4f89b6448da0d6c7b309c2044ePress  (ログオン: the logon button) to sign in to My Class Remote as an instructor.
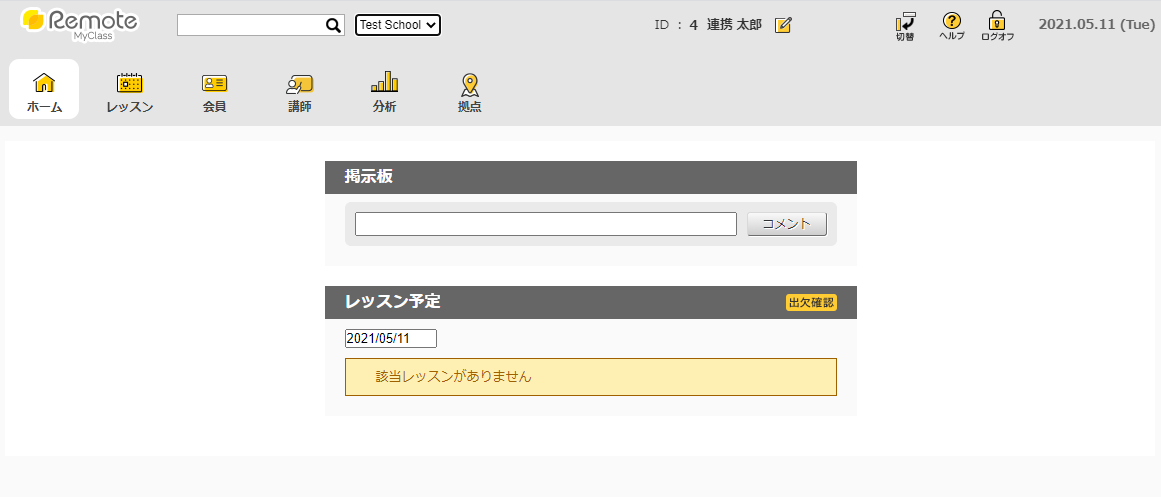
Now you can see MyClass Remote Top page.
Move to the instructor screen and integrate the instructor (currently signed in) with the Zoom app.
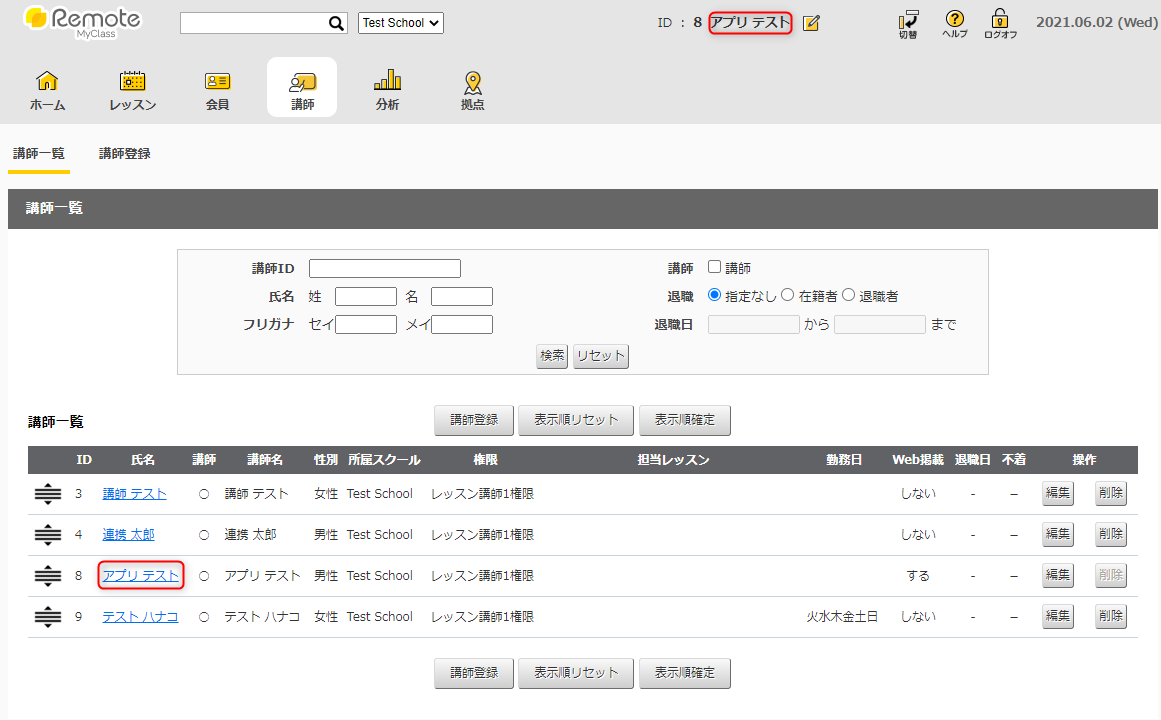
First, click  (講師: instructor) tab at the top of the screen to move to the instructor list screen.

Click the name link (this time  ) to move to the detailed information screen.
If it has not been integrated yet, the (連携:add to Zoom)button is displayed in the "Zoom アカウント"(Zoom Account) field. In the state you are signed out of Zoom, click this "add to Zoom" button. (If you do not log out, the original screen transition will not occur)
At this time, a modal window confirming the integration will be displayed, so click the "OK" button.
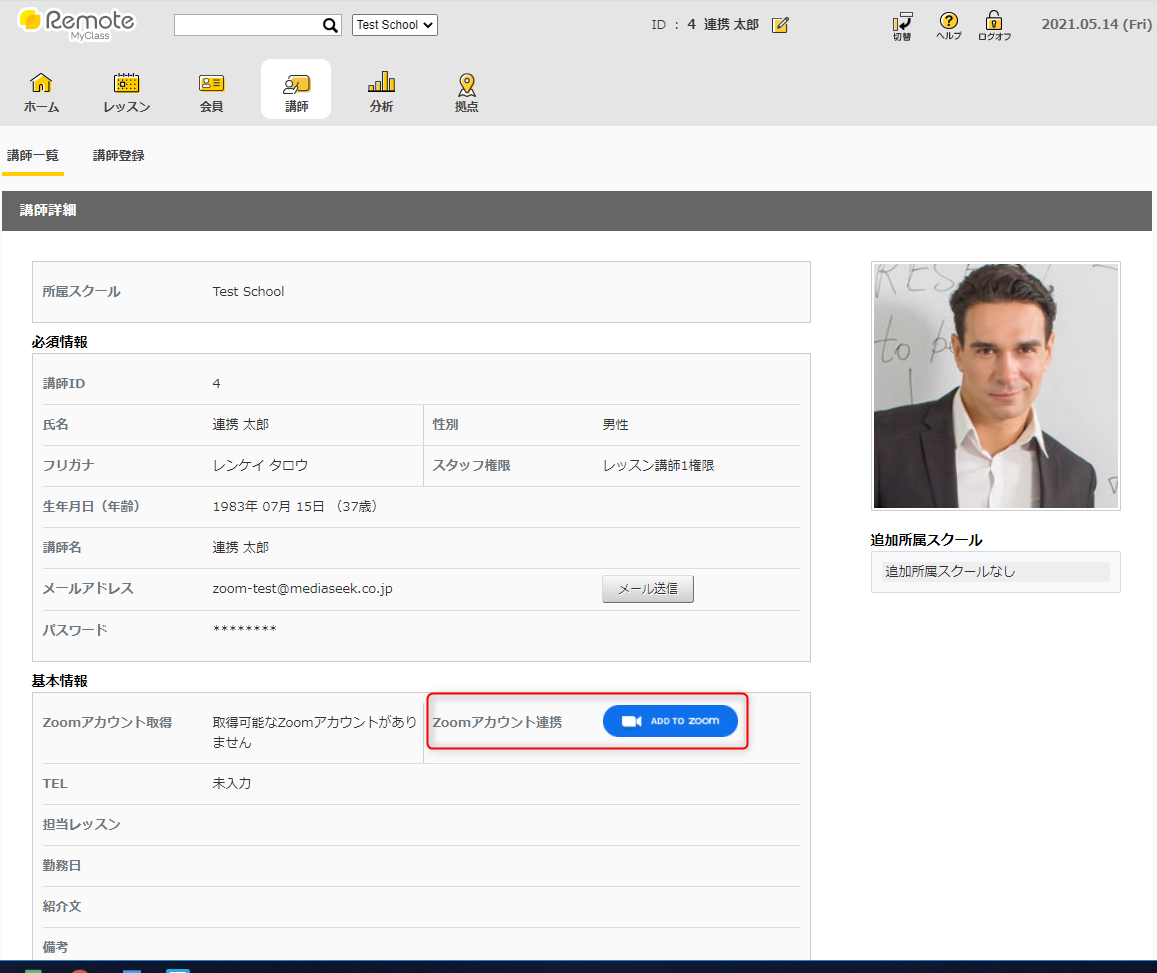
The screen will transition to the Zoom sign-in screen.
Refer to the Zoom installation help (# 4 / # 5 / # 6) for subsequent operations.
*You can see the demo operation video of loom.
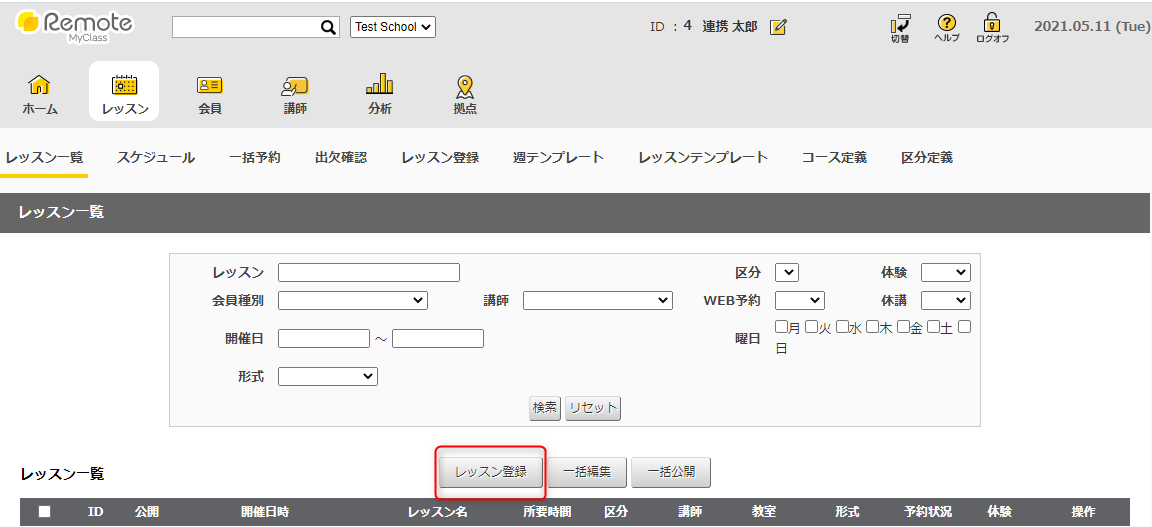
https://www.loom.com/share/a7c11a2fb370421f9c0ed22a28490a8fYou create online lessons of Zoom on MyClass Remote. Click the  (レッスン: lesson) tab at the top of the screen to move to the lesson list screen.

Click the  (レッスン登録: register a lesson) button to move to the
  (レッスン登録: lesson registration) screen.
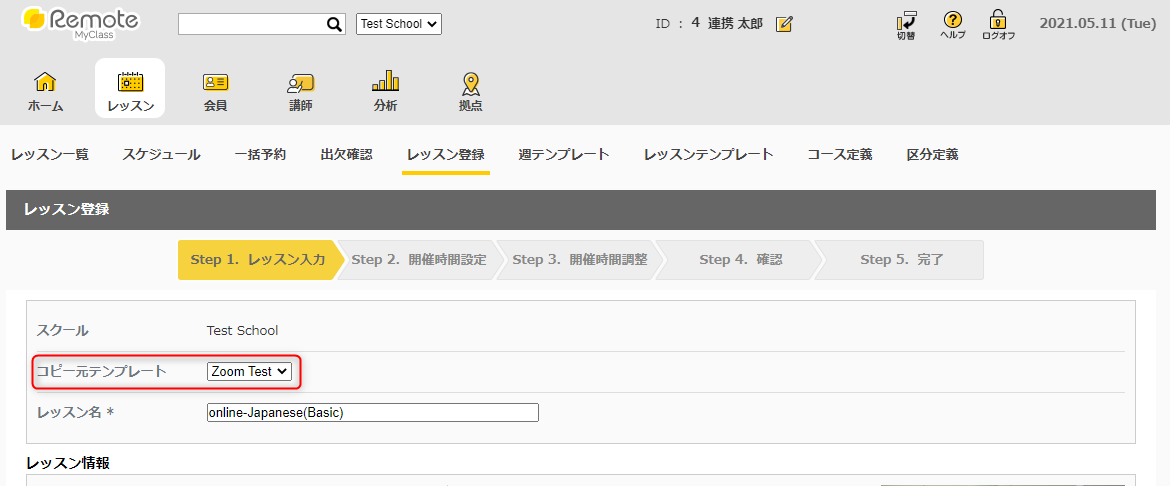
On the "Step 1. レッスン入力" (Input data) screen, enter the lesson information (excluding the schedule). This time, by selecting  (Zoom Test) in the "コピー元テンプレート"(Copy from template) field, you can omit the input of most items.
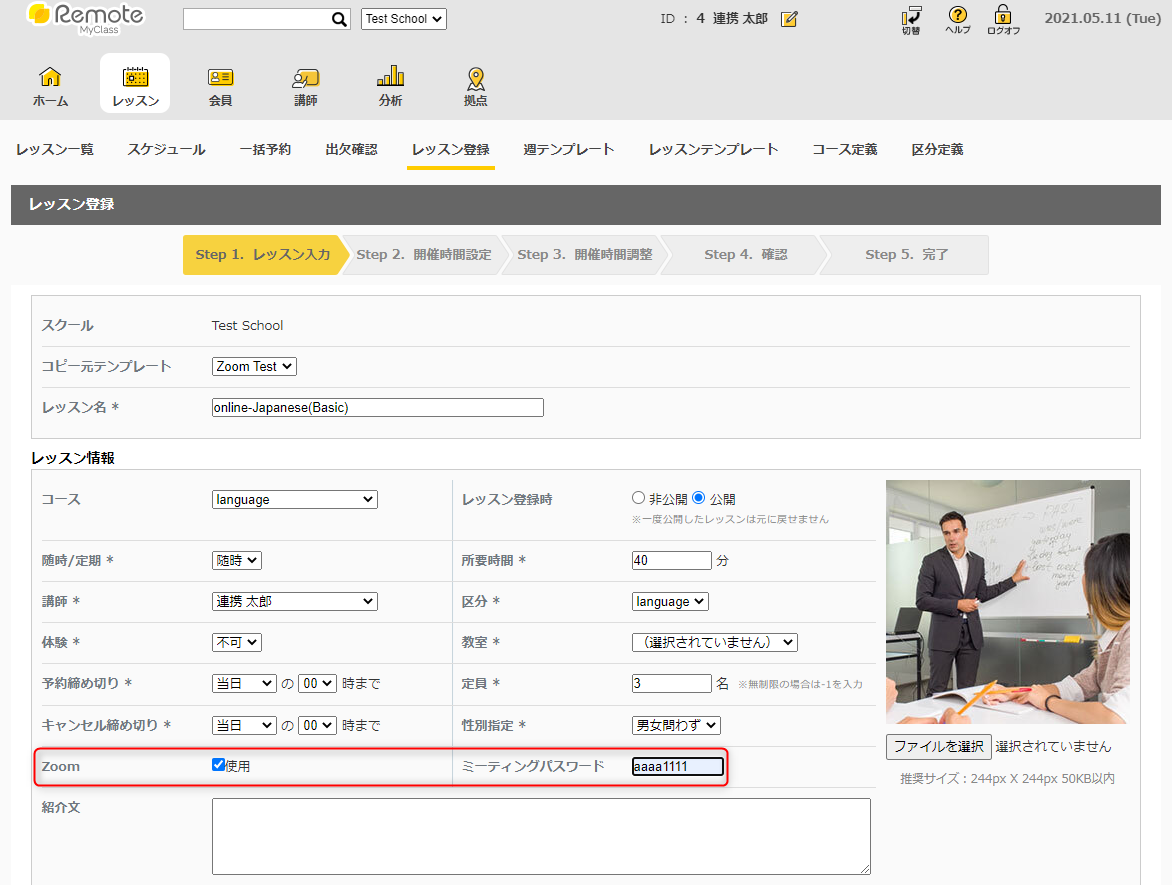
Then check the  (使用: use)box of “Zoom” field and enter the
  (ミーティングパスワード: meeting password).
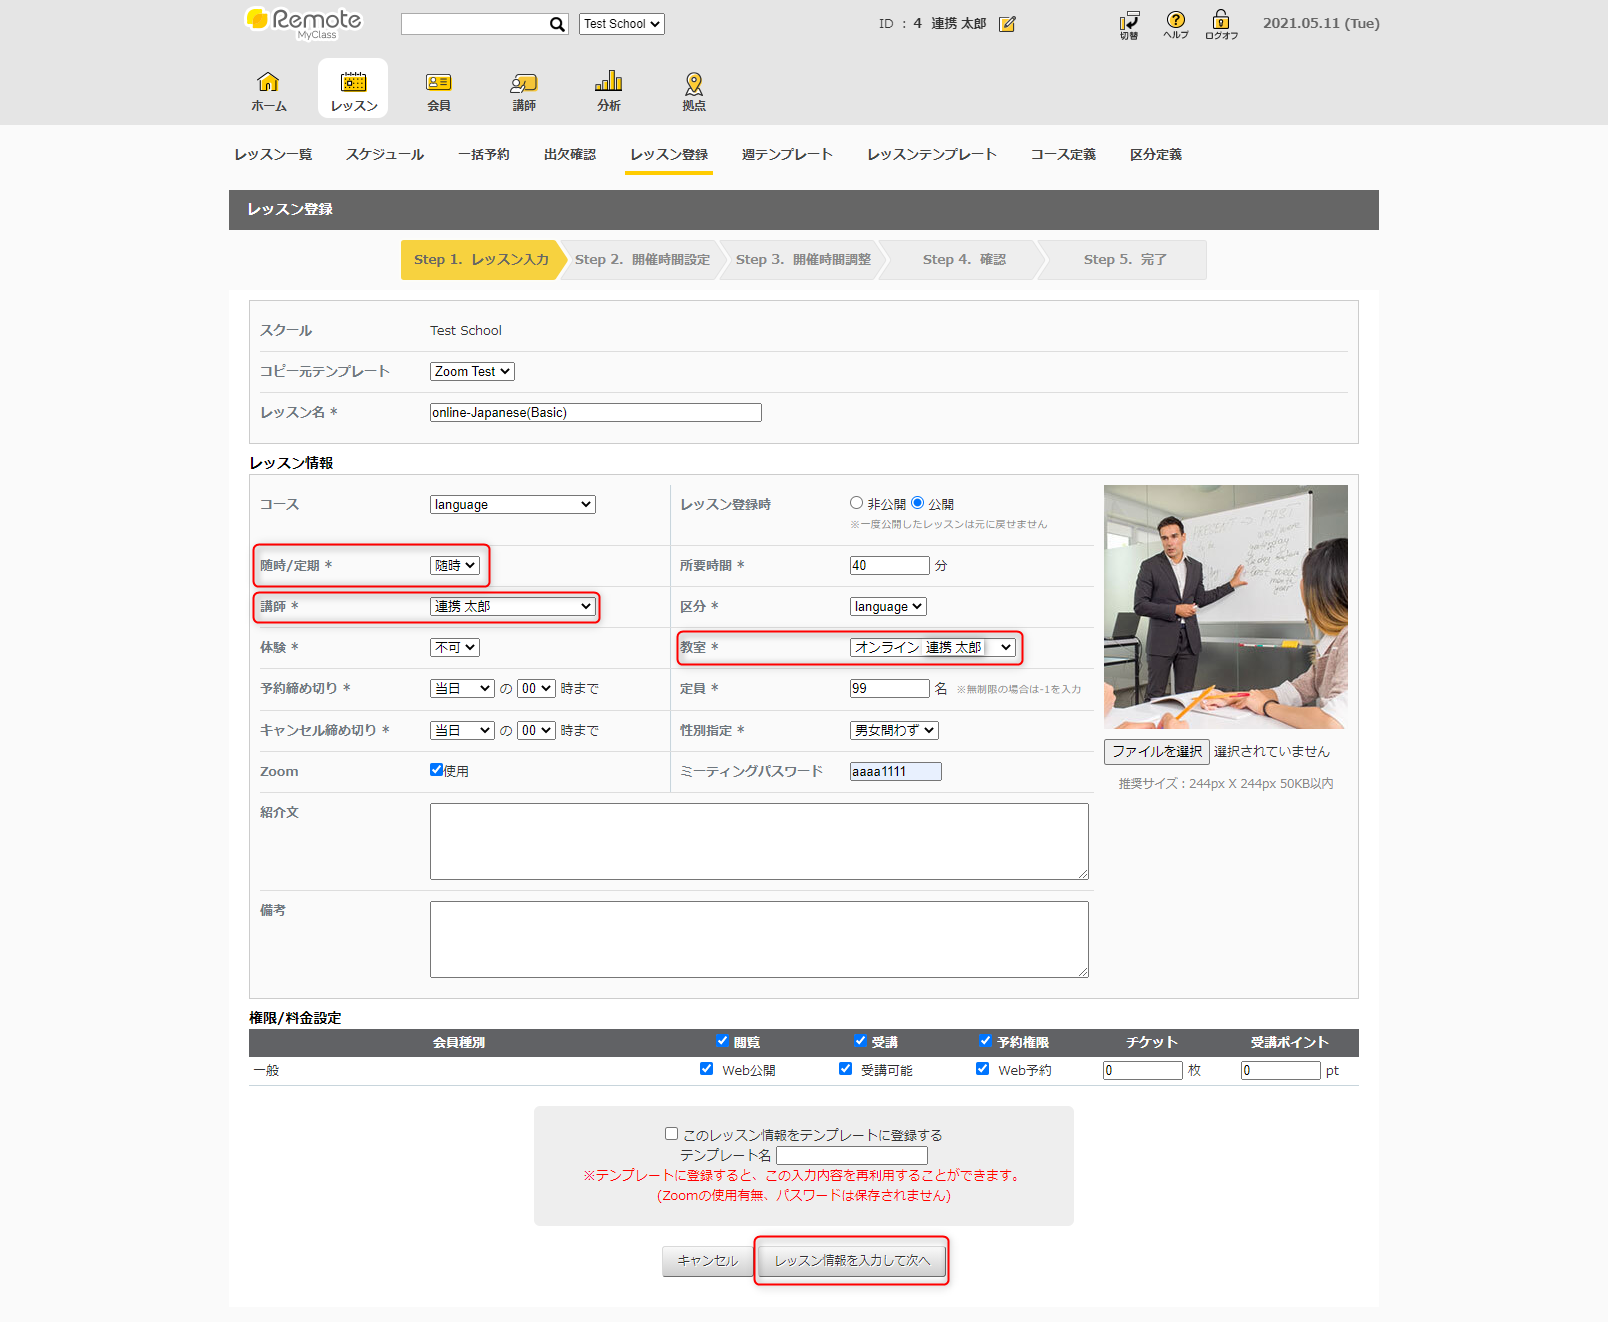
Before proceeding to the next screen, check the following points.
 (随時: one-time lesson) in the "随時/定期" (one-time lesson or regular lesson) field. (It does not support regular online lessons)
 ) is displayed in the "講師" (instructor) field.
 ) (Online + instructor’s name) is displayed in the “教室”(classroom) field.
After entering and confirming, click the  (レッスン情報を入力して次へ: Enter lesson information and next) button at the bottom of the screen.
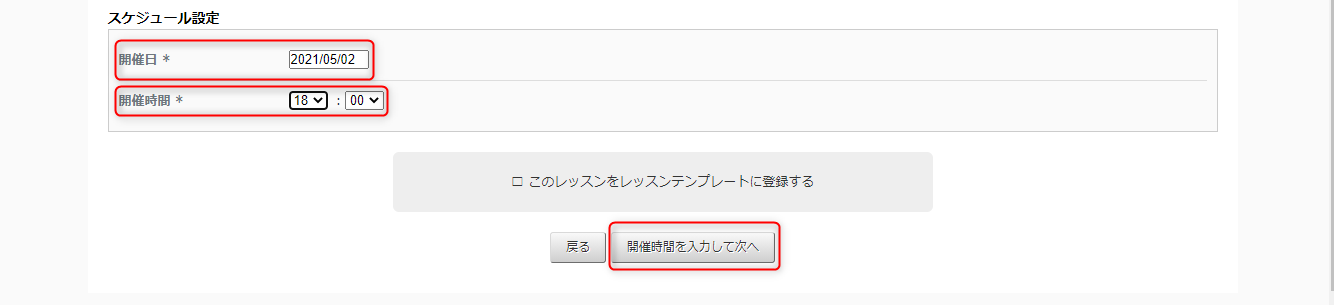
Set the schedule(開催日: Date / 開催時間: Time) on the lesson time setting screen. Click the  (開催時間を入力して次へ: Enter the date and time and Next) button.
*The "Start Zoom" button (described later) will not be displayed on MyClass Remote until less than a week before the lesson starts. Please specify a relatively recent date and time when you register the lessons for the review.
If there are no duplicate instructors or classrooms, skip ”Step 3. 開催時間調整” (Time adjustment) and ”Step 4. 確認” (confirmation) will be displayed. Click the 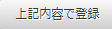 (上記内容で登録: Registration) button at the bottom of the screen.

The screen will change to the lesson list screen, and the message "レッスン登録が完了しました"(Lesson registration is complete) will be displayed.

* If the following message "Zoomとの連携に失敗しました"(Failed to connect with Zoom) is displayed, the lesson was created on MyClass Remote, but the connection with Zoom has failed. After a while, click the "Zoom再通信"(Zoom Re-connection) button on the right. At that time, a pop-up window for entering the meeting password will be displayed (It doesn't matter if the password you entered earlier or not). If the error message disappears, the lesson registration is complete.
Then use your member's account to reserve your registered lessons.
*You can see the demo operation video of loom.
https://www.loom.com/share/c228ed3185da486eb9c7339cceaf1402Go to the reservation page and sign in with your member account.
https://zoom-ticket.myremo.jp/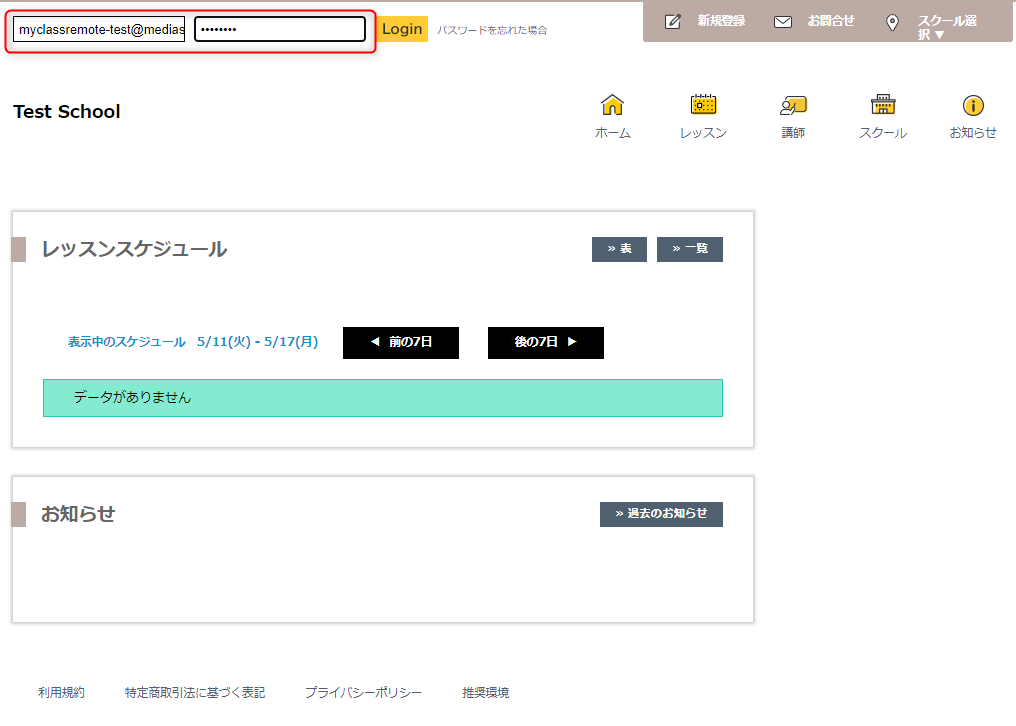
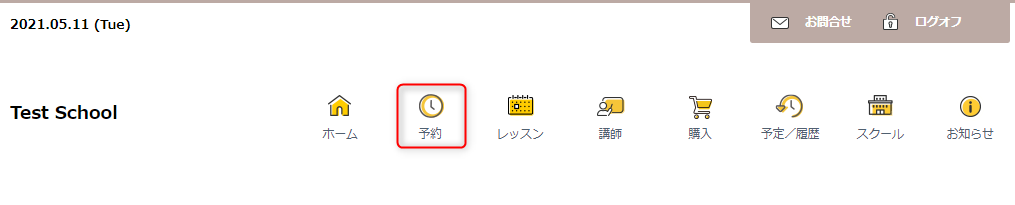
After signing in, click the  (予約: reservation) icon next to the house icon at the top of the screen to go to the "予約"(reservation) screen.
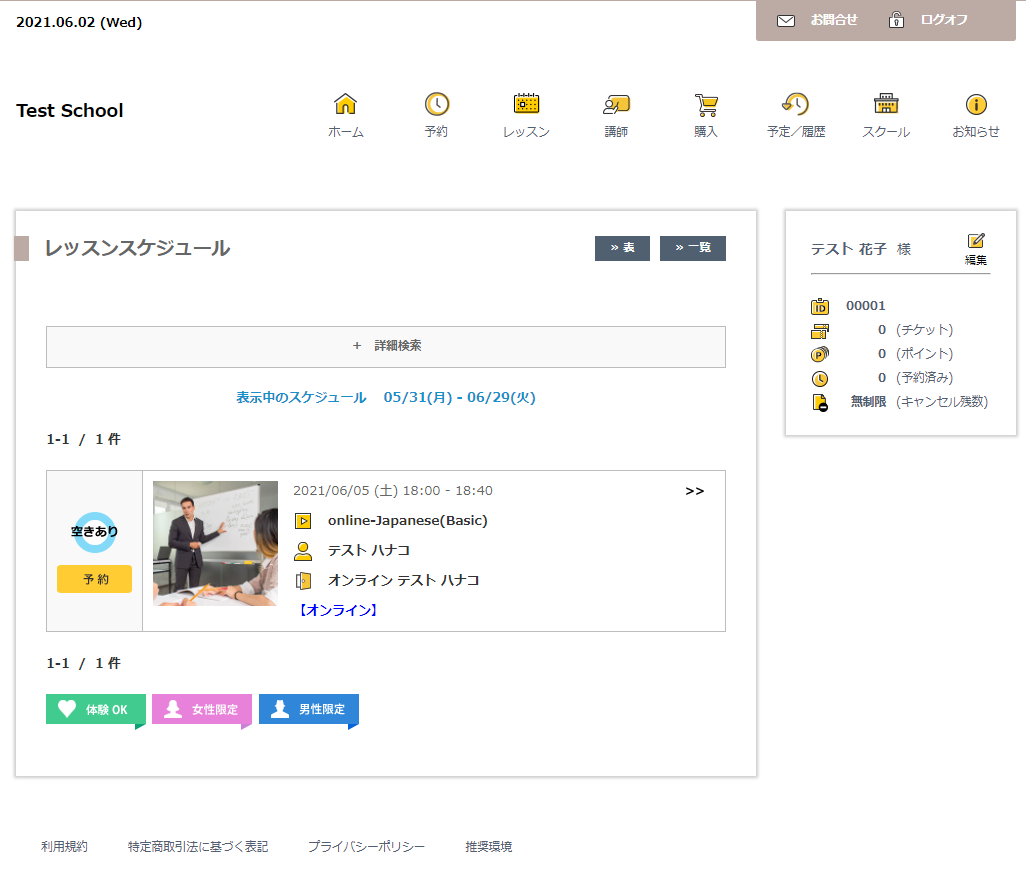
On the reservation screen, the lessons registered by the instructor account earlier are displayed. Select this lesson to go to the lesson details screen.
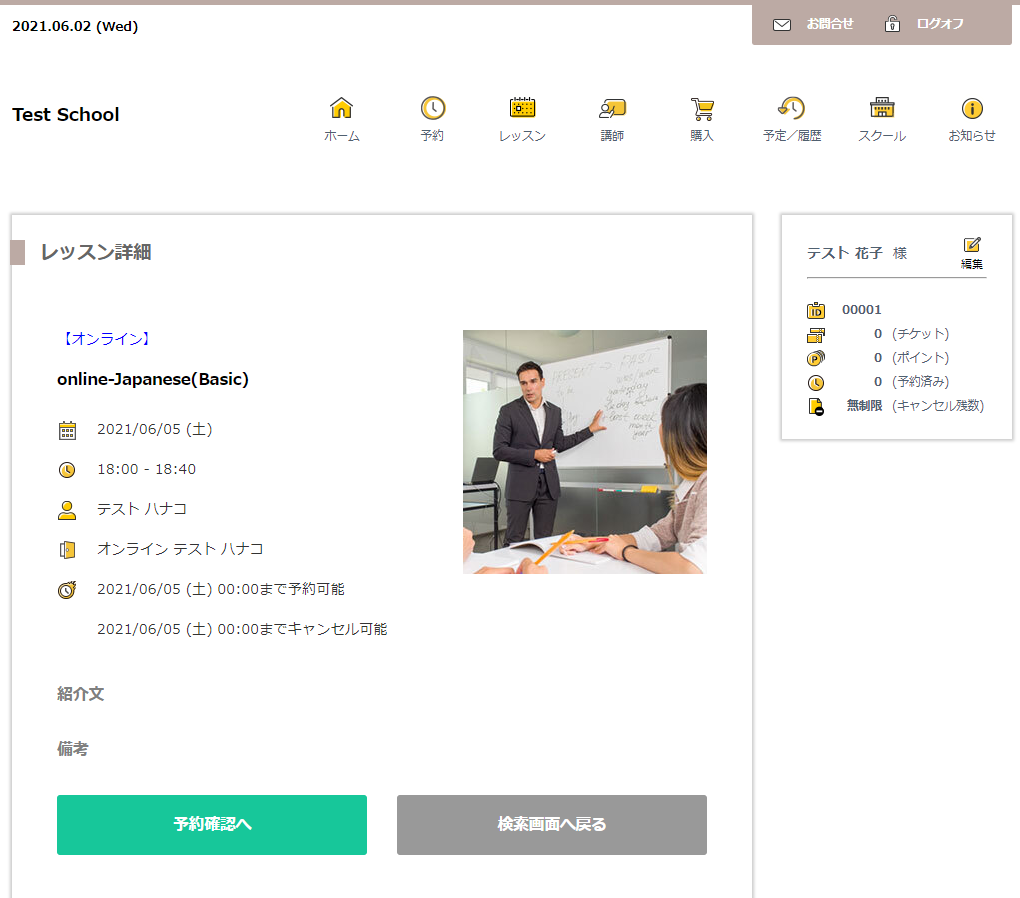
Click the  (予約確認へ: confirmation) button in the middle of the screen.
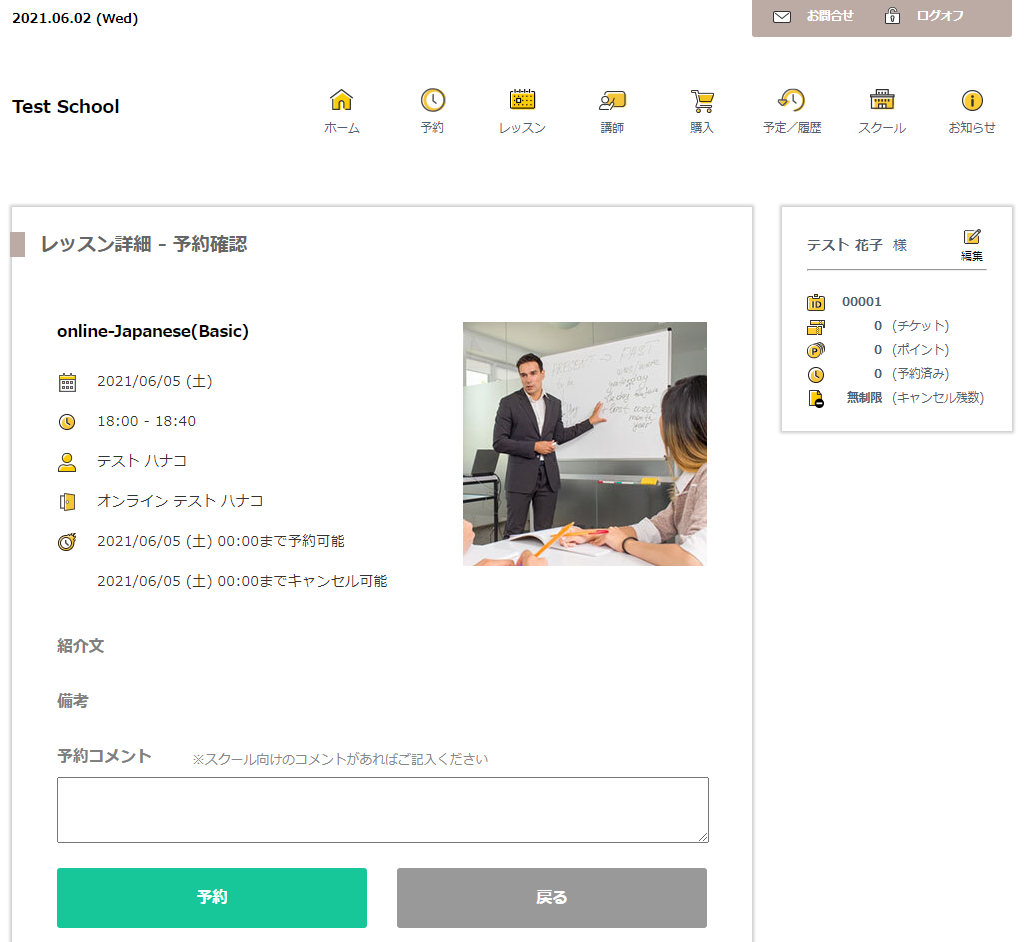
Click the  (予約: reservation) button to complete the lesson reservation.
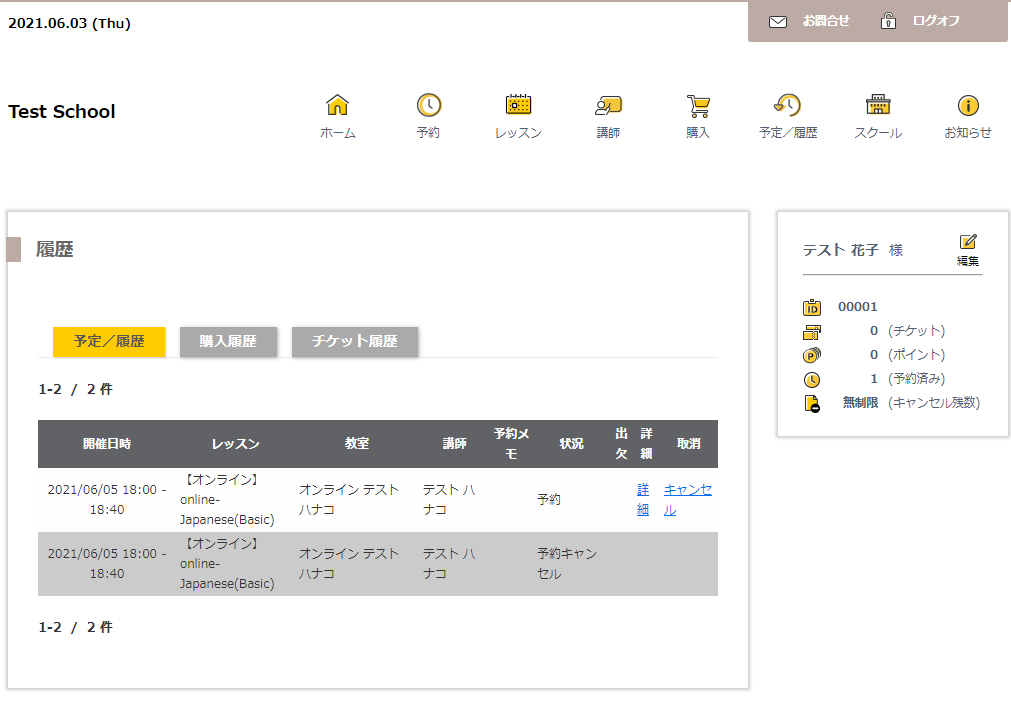
Click the  icon next to the shopping cart at the top of the screen to go to "予定/履歴"(the schedule / history) screen.
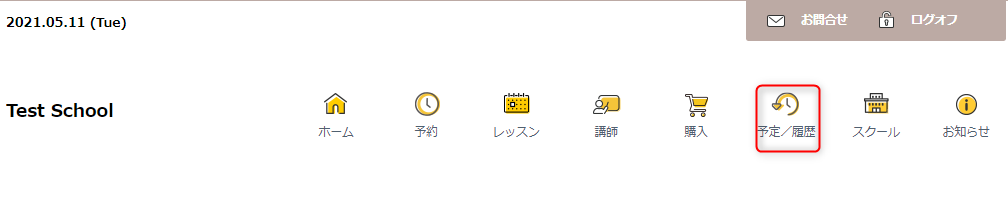
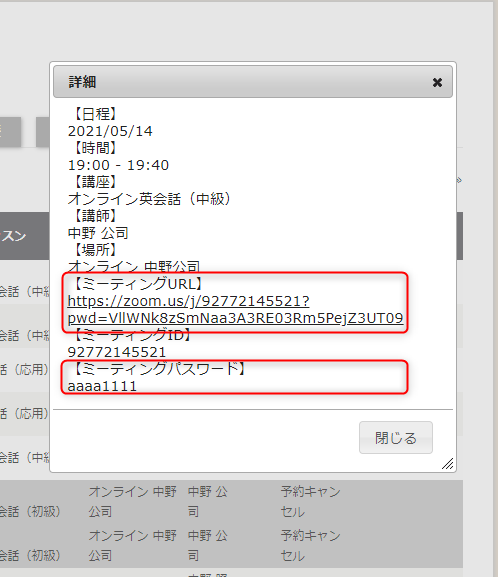
Check the reserved lesson information on the  schedule / history screen. Clicking the
  "詳細"(Details) link for the lesson you reserved will bring up a modal window with detailed information about the online lesson, including the Zoom URL and password.
*You can see the demo operation video of loom.
https://www.loom.com/share/bc83a1f660b2474cb81e8e6ae523050fHosting the Zoom lesson by the instructor
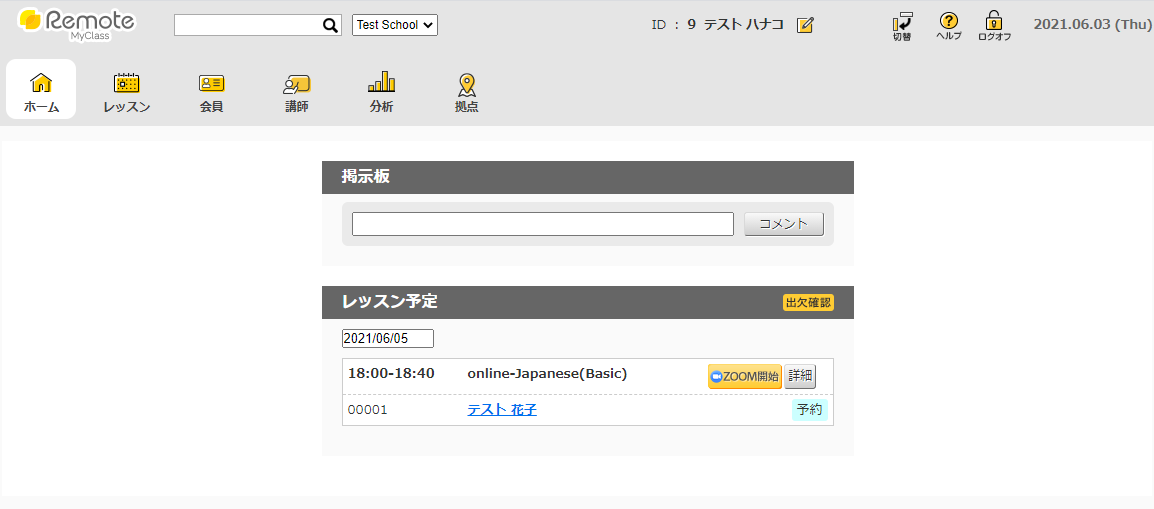
The instructor proceeds to the top page in the state in which signed in to MyClass Remote. If you select the date when the lesson was registered in the lesson schedule in the center of the screen  (レッスン予定: lesson schedule), you can confirm that the registered member name is displayed under the registered lesson holding time and lesson name.
Click the yellow  (Zoom 開始: Start Zoom) button to launch the Zoom app and host a Zoom meeting. (When the pop-up window appears, click OK to allow the connection with Zoom.)
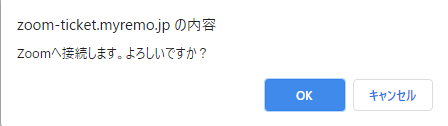
(Zoomへ接続します。よろしいですか?: Connect to Zoom. Is it OK?)
Taking the Zoom lesson by a member
*If you are signed in with a Zoom account linked with your instructor, please sign out.
Go to the "予定/履歴”(schedule / history) screen on the reserving page, click the detailed link for the lesson you reserved, and click the meeting URL in the modal window that appears.
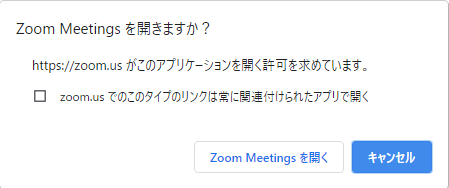
(Zoom Meetings を開きますか?: Do you want to open Zoom Meetings?)
If the status is as follows, the deauthorization has been succeeded.
![]()